
How to Make a Metal Sign: A Step-by-Step Guide for Beginner
Metal signs are unique in the signage industry due to its durability, visual appeal, and versatility.This extensive guide will walk you through the key techniques and insights required to make a metal sign. We provide a thorough roadmap for your artistic journey, beginning with determiningwhich materials and tools are best for you, to a step-by-step guide for making a Metal Sign by Expert. Let’s get into the world of metal sign-making and discover your artistic potential!
What is a Metal Sign?
Explore Our Metal Sign Collection Here

Metal signs have long been a staple in various settings, including homes, businesses, and public spaces. These signs are typically made from materials such as aluminum, steel, or brass,offering durability and a sleek, modern look. The appeal of metal signs lies in their ability to withstand the elements, making them suitable forboth indoor and outdoor use. From vintage-inspired designs to contemporary logos, metal signs can be customized to suit any style or purpose, making them a popular choice for signage enthusiasts.
Having uncovered the basics of metal signage, now let’s look at which tools you’ll need to make your metal signs.
Essential Tools for Making Your Metal Signs
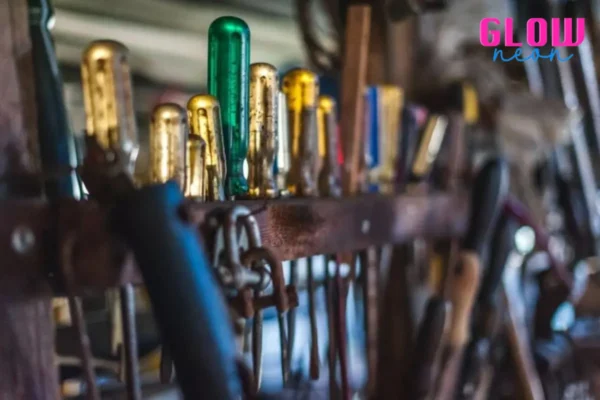
Before you begin crafting your metal sign, it’s essential to gather the necessary materials and tools. Here’s a list of the essential items you’ll need to get started:
- Metal sheet (e.g., aluminum, steel)
- Safety equipment (gloves, goggles, ear protection)
- Cutting tools (jigsaw, metal shears)
- A metal shaping tool (such as a metal bender or a mallet and dolly set)
- Marking tools (pencil, ruler, stencil)
- Drill and screws (for mounting)
- A deburring tool to smooth rough edges
- A file for shaping and finishing
- Paints or finishes (optional)
These materials are readily available at most hardware stores and online retailers, making it easy to embark on your metal sign-making journey.
Armed with the necessary tools, let’s embark on the detailed step-by-step process of crafting our metal signs.
Step-by-Step Guide to Making a Metal Sign
Now that you’ve assembled your materials let’s dive into the step-by-step process of making your metal sign:
Choosing the Right Metal for Your Sign
When deciding on the metal for your sign, it’s crucial to weigh both its visual appeal and durability. Commonly utilized metals in sign fabrication encompass aluminum, steel, and brass.
Aluminum emerges as a favored option for outdoor signage due to its lightweight composition, cost-effectiveness, and resistance to corrosion. It is ideal for those seeking a budget-friendly, enduring signage solution. Furthermore, aluminum lends itself well to customization with an array of finishes and colors.
Steel is well-known for its durability and robustness, rendering it a dependable choice for signs exposed to inclement weather or heavy usage. However, it may require further treatments to prevent rusting. Applying protective coatings or using stainless steel variations can improve its corrosion resistance.
For those seeking a sophisticated, timeless appearance, brass emerges as the metal of choice.Brass signs convey sophistication and timeless elegance. Nonetheless, brass is often priced higher than other metals. Its striking golden tint and ability to develop a natural patina over time make it a popular choice for high-end signage solutions.
When deciding on the best metal for your signage, it’s critical to consider the individual needs ofyour project, such as location, budget limits, and intended visual impact. By carefully selecting the metal, you can ensure that your sign looks great and holds up over time.
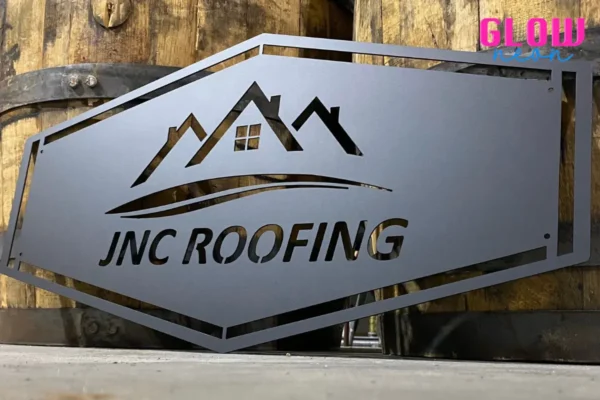
Designing Your Metal Sign
Once you’ve chosen your metal, it’s time to plan your sign’s design. Whether you’re creating a custom logo or a decorative piece, take the time to sketch out your ideas and finalize your design before moving on to the next step.
Cutting and Shaping the Metal
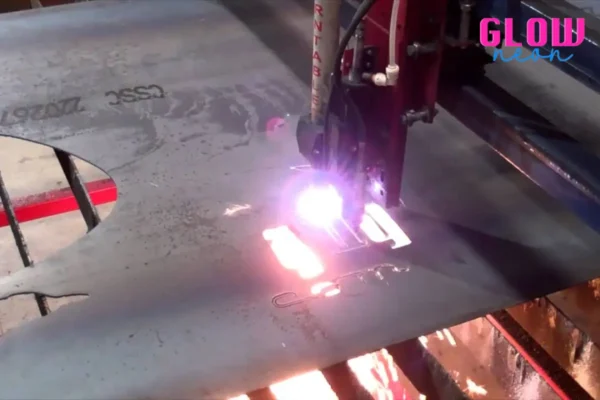
Before you cut the metal, make sure it is securely positioned on a work surface. Cut out the shape of your sign using your chosen metal cutting instrument and the lines you marked. Take your time and keep a steady hand. If required, use clamps to secure the metal in place.
After cutting out the outline, you may need to shape or form the metal to give your sign depth and dimension. Use a metal shaping instrument, such as a metal bender, mallet, or dolly set, to carefully manipulate the metal into the required shape. Take frequent stops to assess your progress and adapt as required.
Adding Text or Graphics
Once the metal has been cut to size, use a pencil or stencil to sketch any text or artwork you want to add to the sign. Take your time to ensure that your markings are accurate and precise before proceeding to the following stage.
Finishing Touches
After adding your text or graphics, it’s time to add any finishing touches to your sign. Depending on your design preferences, you may choose to paint the metal, apply a protective finish, or leave it bare for a rustic look.
Mounting Your Metal Sign
Finally, use a drill and screws to mount your metal sign in its desired location. Whether you’re hanging it on a wall or displaying it outdoors, be sure to use appropriate hardware and follow safety guidelines for secure installation.
Importance of Safety When Making Metal Signs
Making a Metal Sign involves cutting, shaping, and drilling metal, all of which might pose safety risks. Here are some important safety guidelines to keep in mind.
- Always wear safety glasses, gloves, and hearing protection.
- When working with paints, primers, or metalworking tools, make sure the environment is well-ventilated.
- Be aware of sharp edges and wear suitable gear to protect your arms and legs.
- When using power tools such as jigsaws or plasma cutters, carefully follow the manufacturer’s instructions and use the appropriate safety equipment.
Ideas for Making a Metal Sign

The possibilities for making a metal sign are endless, limited only by your imagination. Here are a few ideas to spark your creativity:
- Create personalized signs for your house or company, including welcome signs, family names,and business logos.
- Inspirational quotes or phrases.
- Custom address plaques
- Business signage featuring your logo or brand message.
- Vintage-inspired decor items
Feel free to try out different designs, materials, and finishes to make a metal sign that expressesyour distinct style and personality.
Summary of the Metal Sign-Making Process
With this complete step-by-step guide, you now have the knowledge and confidence to start making your metal sign. Remember to stay safe, have fun with the process, and let your creativity come through in your unique designs. And if you’re looking for a diverse range of options, Glow Neon Store is ready to meet your metal sign demands with superior craftsmanship and inventive designs.